Powered by Blogger.

Sunday, August 26, 2012

Cheesy Chicken and Rice


This is another Pinterest recipe. You can find the original at Southern Plate.

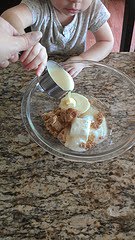
I thought it was a good start to a recipe, but it was a bit bland for me. The recipe says to place 4 boneless, skinless chicken breasts in the crock pot, top with one chopped onion, then spoon 1 can cream of chicken soup over the top. Cover and cook on low for 7-8hrs or high for 3-4hrs. Then add 1 can corn and 1 box yellow rice and 1 cup shredded cheese before serving.


Now, when I was assembling this, I did not like dumping these ingredients in with no seasoning. I just never cook like that. I season everything. But, I wanted to try it as is first.

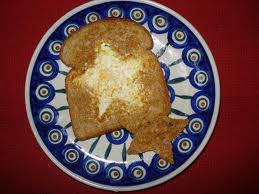
And the finished product was, well, bland. Also, I found the chicken to rice ratio to be a little heavy on the chicken. This could just be me, but I really liked the yellow rice (I had never tried it before) and wanted there to be more of it.


Lastly, I doubled the cheese (the original recipe calls for 1 cup, I put in 2 cups) and I still tasted NO cheese. Now, if you are going to call something "cheesy" in the recipe title, I need to actually taste cheese. I don't know. I'm a stickler like that.

So, here are the changes I made and liked it much better:

4 boneless, skinless chicken breasts
1 onion, chopped
1 can cream of chicken soup
1 can diced green chiles
salt, pepper, garlic powder to taste
2 boxes Zatarains Yellow Rice
1 can whole kernel corn
4 cups cheddar cheese, shredded

I put the chicken at the bottom of the crock pot, seasoned with salt, pepper and garlic powder. Use less salt than you usually do b/c the cream of chicken soup and the yellow rice have added salt.

Top with chopped onion, can of green chiles (the small can) and spoon soup on top of that. Put the lid on, cook on high for 7-8 hrs.

With the last few minutes of cooking, add can of corn, cooked rice and cheese. Stir it all in and let warm through and melt cheese.

The green chiles added extra flavor, but was not spicy. I love green chiles, but if they are not your thing, you could do a can of diced tomatoes or chop up some bell peppers or something. I just think it needs some kind of extra flavor.

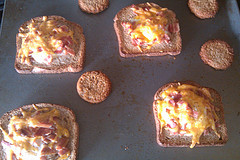
I also sprinkled cheese on top before serving. You know, the "cheesy" thing.


Enjoy!


Friday, August 24, 2012

Salted Caramels


The best part about these cute little chewy, tasty treats is that I made them in the microwave.

I found this on pinterest. The only change to the recipe that I made was to add vanilla extract and sea salt.

It heats up in 7 min in the microwave and no thermometer needed. Way cool!

Ingredients:
1/4 cup butter
1/2 cup granulated suger
1/2 cup brown sugar
1/2 cup light Karo syrup
1/2 cup sweetened condensed milk
1/4 tsp vanilla extract
sea salt


Directions:
Combine all ingredients in a microwave safe mixing bowl.


I had little helpers :)

Heat in microwave (at full power) for 7 min, stirring every 1.5 to 2 min. Stir in vanilla extract.


Pour hot mixture into buttered 8x8 baking dish, sprinkle with sea salt immediately and cool in refrigerator about 20 min.


Cut the caramels into squares and wrap in wax paper. To cut these, I sprayed the knife with cooking spray and used an up and down motion rather than trying to pull the knife through the caramel.

I needed to clean the knife and reapply the cooking spray a couple of times. Cutting was significantly easier in the beginning, but about half way through, the caramel got very stretchy and came out more like globs than nice squares. Since, I was wrapping them, the shape didn't matter as I was rolling them into little logs anyway. If you weren't wrapping these and wanted to present them a different way, you'll need to work very fast or maybe put them back in the fridge halfway through to keep them looking neat.

Good news is, the caramels easily came out of the pan, no mess at all.


This made about 45 caramels, but as you can see in the picture, I wasn't very consistent with the size of them and some were way too big, so this recipe could probably make a few more.

They turned out just as good as any stovetop-constant stirring til your arm falls off-candy thermometer requiring-caramels, in my opinion. And they were super easy!

Some of the caramels did stick to the wax paper for some reason. I'm not sure why some did and some didn't. It wasn't terrible, just required a little extra peeling off of wax paper. I thought about maybe spraying the paper squares with cooking spray before wrapping, but I think that may make a greasy mess. Maybe wrap them in cellophane instead? I don't know.

But I like the look of the wax paper wrapped candies in this vintage-y blue candy dish.


Enjoy!


Linking up with these great parties (they're kind of a big deal):

SixSistersStuff.com


Too Much Time On My Hands

{nifty button}

One Artsy Mama
Pink Hippo Party


Tuesday, August 14, 2012

Bacon and Cheese Egg Toast


I have seen this called "Egg in a Hole" and "Egg in a Basket".

It's a super simple recipe that I just changed up a bit by adding some bacon and cheese.

Simply cut a hole in the middle of your sliced bread. I used whole wheat sandwich bread, but you could use any kind of bread. A big thick Texas toast would be good for this recipe.

I sprayed the baking sheet with cooking spray, buttered the bread and cut out a hole (use a cookie cutter, biscuit cutter, or free-hand it).


Crack the egg in the hole, sprinkle salt and pepper over the egg, top with cooked, crumbled bacon and some shredded cheddar cheese. Pop it in a 400 degree oven and watch closely until it is cooked to your liking.


I baked the piece that was cut out (and also buttered) as well. The idea is to cook the egg sunny side up and use the extra piece to dip in the runny yolks. I, however, baked this until the yolks were hard. You can see in the pic it is quite toasty. Since I was serving this to kids, it was less messy than runny yolks, but really it should be cooked less than I did here.

Serve it up and watch your kids ponder how the egg got in there :)

What I should have done was make fun shapes like this:


Enjoy!


Tuesday, August 7, 2012

Kids "Sushi Bento" Lunch Box


For my daughter's first day of 5th grade, I decided to make her a surprise lunch. She loves sushi and her and I enjoy having girl's sushi night out since the boys in our house are not big fans of sushi. So, her lunch was a sushi themed bento box :)


These are tortilla pinwheels made with spinach tortillas, ranch cream cheese, turkey and olives (Amelia loves olives).


On the side, are cucumber rolls (cucumber slices rolled around sticky sushi rice and carrot sticks) and fruit skewers (green grapes and blueberries).

The sushi rice was from Alton Brown's recipe (from Food Network):

Ingredients
2 cups sushi or short grain rice
2 cups water, plus extra for rinsing rice
2 tablespoons rice vinegar
2 tablespoons sugar
1 tablespoon kosher salt

Directions
Place the rice into a mixing bowl and cover with cool water. Swirl the rice in the water, pour off and repeat 2 to 3 times or until the water is clear.

Place the rice and 2 cups of water into a medium saucepan and place over high heat. Bring to a boil, uncovered. Once it begins to boil, reduce the heat to the lowest setting and cover. Cook for 15 minutes. Remove from the heat and let stand, covered, for 10 minutes.

Combine the rice vinegar, sugar and salt in a small bowl and heat in the microwave on high for 30 to 45 seconds. Transfer the rice into a large wooden or glass mixing bowl and add the vinegar mixture. Fold thoroughly to combine and coat each grain of rice with the mixture. Allow to cool to room temperature before using to make sushi or sashimi.

This was very easy to make and the rice was really tasty all by itself. It's perfect for any recipe that may call for sticky rice.


The dessert sushi were Little Debbie blueberry creme rolls sliced and rice krispy treats with swedish fish and fruit by the foot to resemble sashimi.

The chopsticks are stainless steel chopsticks that I found at Lee Lee's (local Asian supermarket).

It was super fun to make, but far more time consuming than packing school lunch should ever be. It's Pb&j the rest of the year :)


"To my favorite sushi partner: Have a great first day of 5th grade! Love you, Mom"

Happy back to school everyone!


Linking up at these fabulous places:

Tuesday To Do Party

UndertheTableandDreaming
I Heart Nap Time